

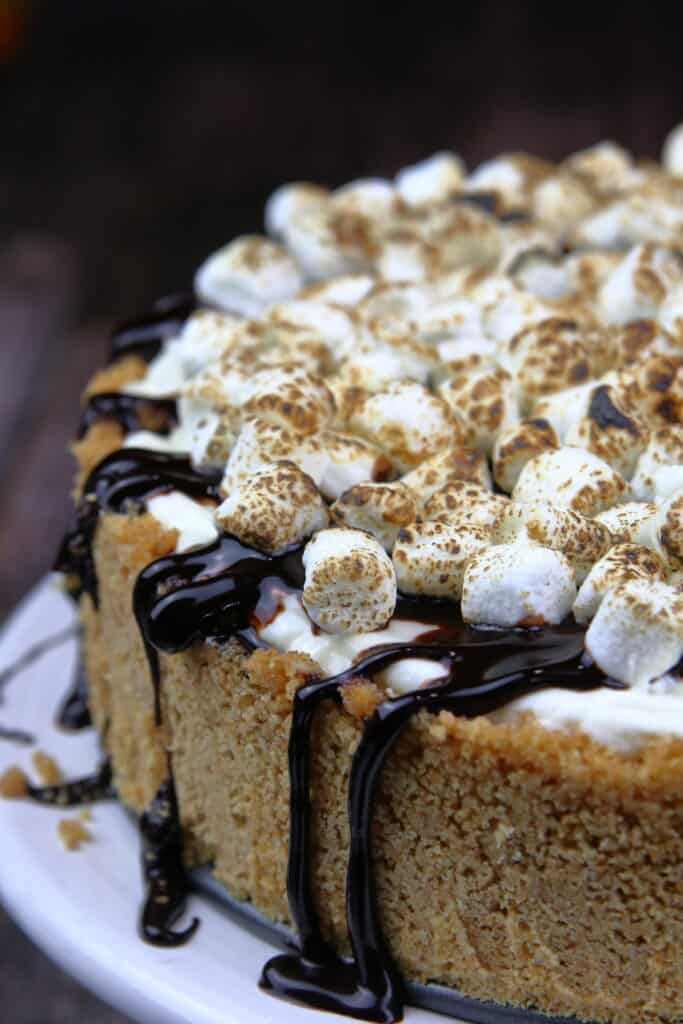
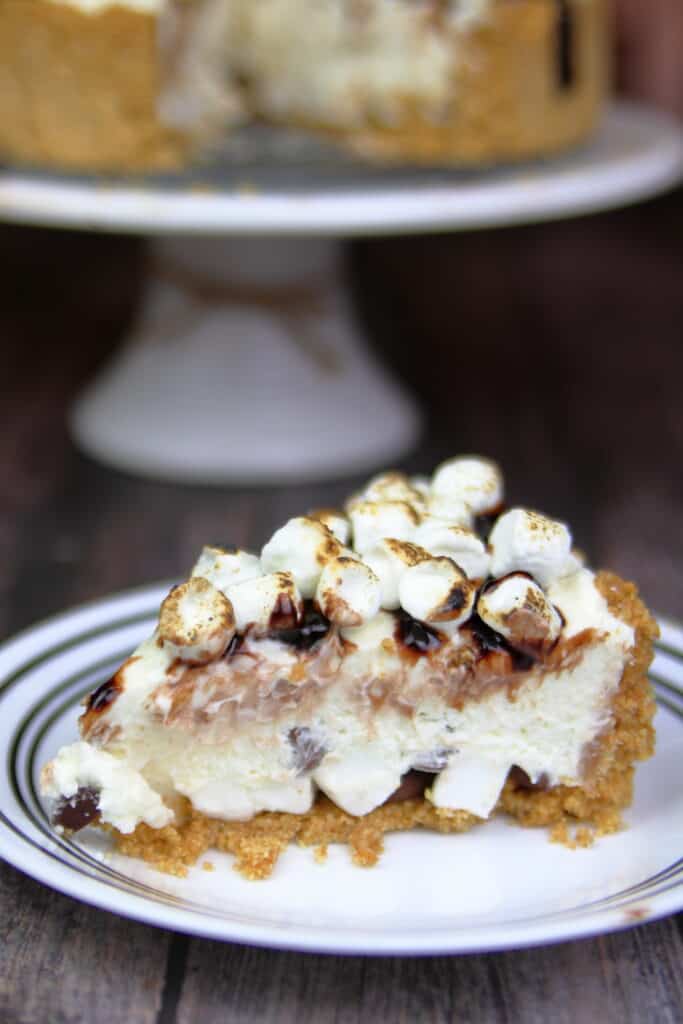
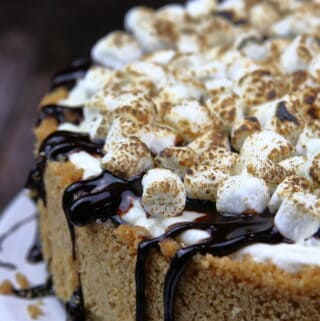
This No Bake S’mores Cheesecake is made with a marshmallow fluff flavored cream cheese, milk chocolate chips, and mini marshmallows and topped with chocolate syrup and toasted marshmallows.
Cheesecakes are some of my favorite desserts to make, but I’ve never made a no bake cheesecake. However, after making this S’mores Cheesecake, I’m a total believer in the No Bake Cheesecake method. I’ve always done conventional cheesecakes, so I had to do a little research on no bake cheesecake recipes, and after reading a recipe from Sally’s Baking Addiction, I was able to learn enough to modify it to my liking.
What is the difference in a no bake and a conventional cheesecake?
Other than the obvious, one is baked and one is not (duh), the biggest difference in a no bake cheesecake recipe is the lack of eggs. Normally my cheesecake recipes include 2-3 eggs, and this one has none.
The batter in general is much thicker in the no bake variety. A regular cheesecake uses more milk, and with the no bake cheesecake, it uses heavy cream whipped to hard peaks. You don’t have to have a stand mixer to get these though. I regular hand mixer will work just fine.
Putting the layers in your s’mores cheesecake
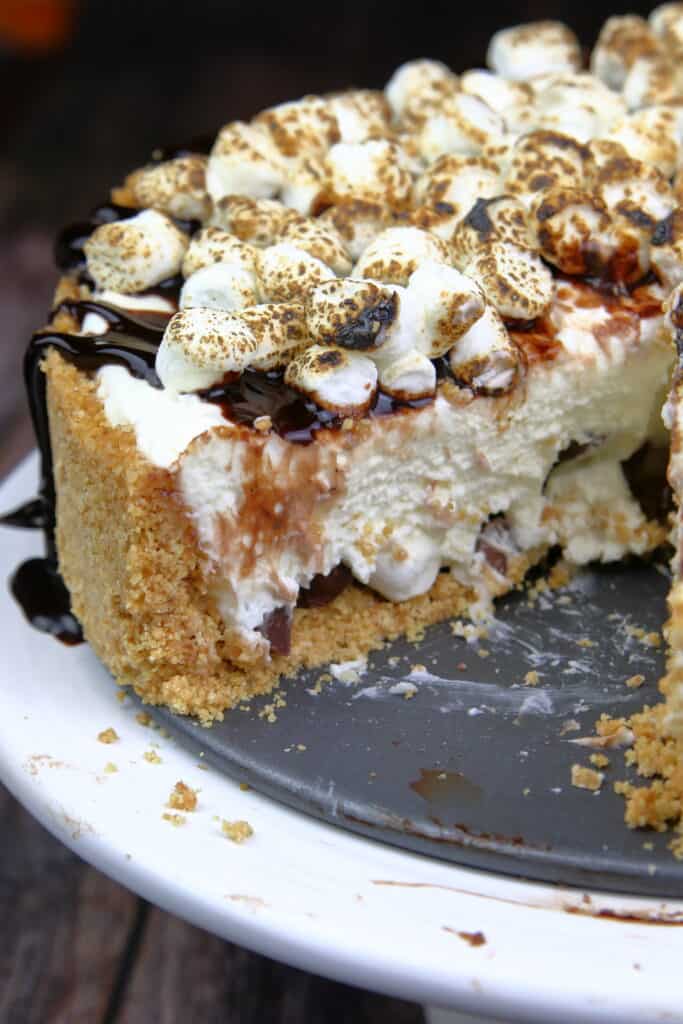
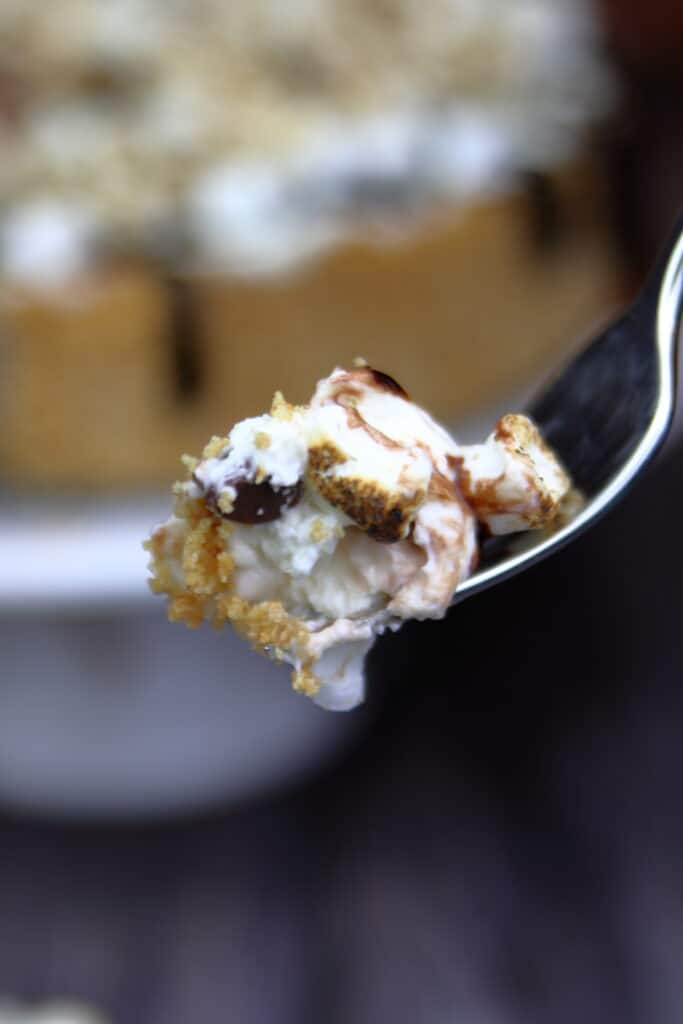
This s’mores cheesecake is more than just a standard cheesecake topped with some toasted marshmallows. I tried to make sure marshmallow was layered throughout, and the result came out to be a light, smooth, pillowy, marshmallow cream cheese filling.
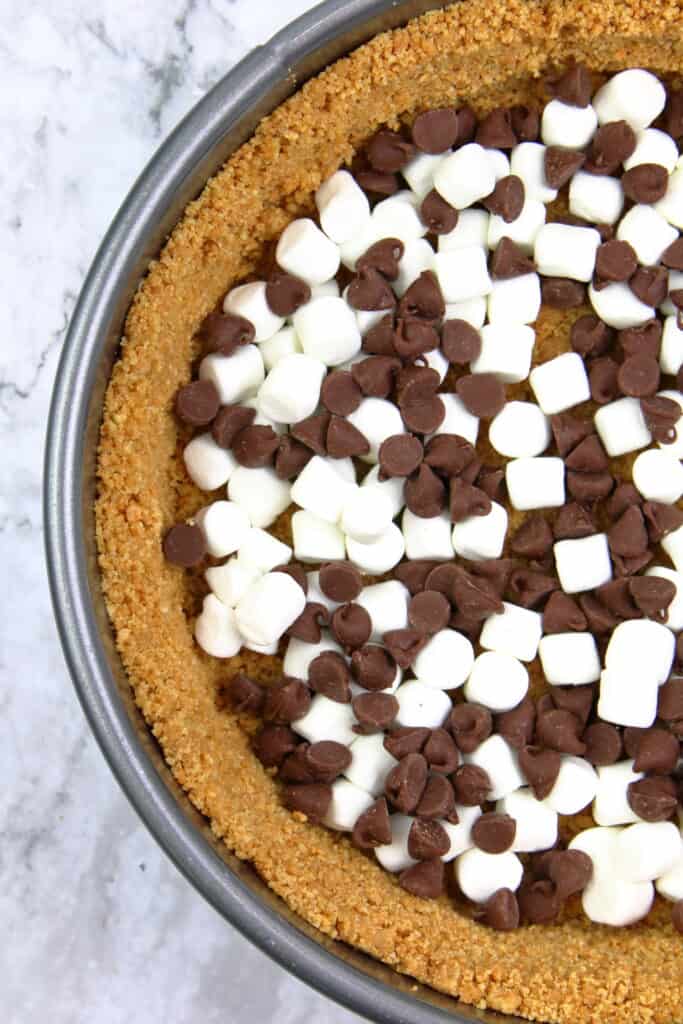
I wanted to make sure there were pieces of chocolate AND marshmallow, so I layered them along the bottom of the crust.
To get the light and fluffy no bake cheesecake filling, there are a few things to remember:
- Make sure cream cheese is at room temperature. I left mine out for several hours. If it it too cold, you won’t be able to get it smooth and creamy.
- Whip the cream cheese. If you have a stand mixer, whip it until it’s nice and smooth. If you don’t have a stand mixer, and hand mixer will work too. This would be the best time to add the extracts and powdered sugar.
- Add marshmallow fluff. The ratio of cream cheese to marshmallow fluff is pretty much 2:1, which gave the filling an even lighter texture and a strong marshmallow flavor.
- Whip the heavy cream into hard peaks. This can be accomplished with a hand mixer if needed, but a stand mixer is ideal since it takes about 4-5 minutes. After you have beaten the cream into hard peaks, fold it into the cream cheese mixture.
The Finishing Touches
Once you have smoothed out the cheesecake filling, cover it and let set for at least a few hours. The filling is already going to be very thick, so it just needs to chill for a few hours to let it reach that firmer, smooth, velvety filling.
After your s’mores cheesecake has firmed up, remove the sides of the springform, drizzle with chocolate syrup and add another layer of marshmallows. If you have access to a brulee torch, definitely give those marshmallows a little fire. You can’t have s’mores without a nice toasted marshmallow!
That’s pretty much it! Super easy, super creamy, SUPER DELICIOUS no bake s’mores cheesecake. Definitely an instant favorite in this house!
As always, please feel free to ask questions in the comment section below.
Enjoy!
Not a believer in the no bake cheesecake method? Try this Spiked Eggnog Cheesecake!
No Bake S’mores Cheesecake
Equipment
- You will need a brulee torch if you would like to toast the marshmallows on top.
Ingredients
For the Filling
- 16 ounces block cream cheese Two 8 ounce blocks
- 7 ounces marshmallow fluff
- ¼ cup powdered sugar
- 1 tsp LorAnn Marshmallow Oil
- 1 ¼ cup heavy cream
- 2 cups mini marshmallows divided in half
- ¾ cup milk chocolate chips
- chocolate fudge for drizzle
For the Crust
- 2 ½ cups finely crushed graham crackers
- 2 tbsp white sugar
- 1 stick melted butter ½ cup
- 2 tbsp honey
Instructions
To make the crust
- Combine graham cracker crumbs, white sugar, melted butter, and honey in a large bowl. Mix around to incorporate all ingredients.
- Press crumbs again the sides of the springform pan (as high as you like) and all along the bottom.
- Add about a cup of mini marshmallows to the bottom of the crust. Add a layer of approximately ¾ cup of chocolate chips. Set aside for later.
To make the Filling
- In a stand mixer with the whisk attachment, whip cold heavy cream on medium high for about 4-5 minutes until stiff peaks form. Transfer to another bowl and set aside.
- Back in the stand mixer, whip the (room temperature) cream cheese until smooth and creamy.
- Add Marshmallow fluff and continue to mix.
- Add powdered sugar, marshmallow oil, and vanilla extract. Mix.
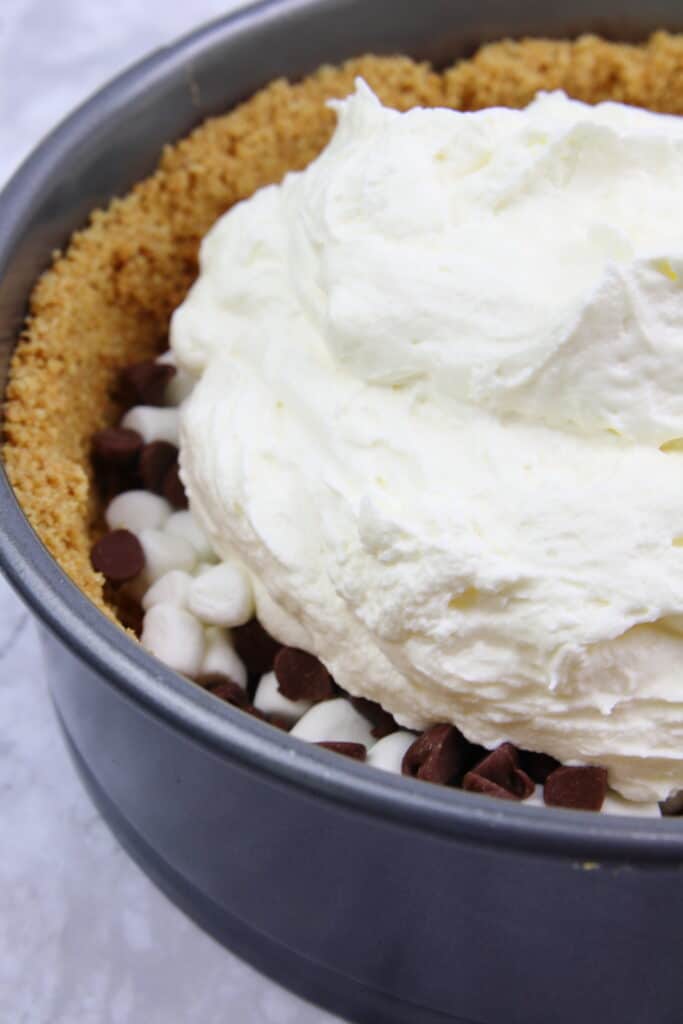
- Gently fold in the whipped heavy cream until fully mixed.
- Spoon into the crust on top of the marshmallows and chocolate. Mixer will be thick. Use a knife or spoon and smooth out the top. Cover and chill for about 4 hours or until fully set.
- Remove from the refrigerator and drizzle with chocolate fudge. If desired, top with more mini marshmallows and toast with a brulee torch.
- Serve and enjoy!
Talk to me!